
Who doesn’t love freshly baked bread on weekends?!
I have always been fascinated with sourdough bread – I mean how awesome is it that this centuries-old tradition is still going strong! I cannot get enough of its tangy flavour, the moist inside and the crispy crust – it just beats any loaf made with commercial yeast!
My body tends to have problems breaking down the gluten and I have found that the long fermentation of the sourdough really helps my digestion. Finally, I can enjoy delicious bread without regrets.
My dear friend Léa and her partner Nico are the creators of the incredible blog
Le Couvert, and when they published a recipe for a sourdough starter I just had to jump on the bandwagon.
Since then I have tried and tested many recipes – some of them requiring a lot of time and TLC for the dough, some of them more successful than others. In the end I always come back to this recipe that I am sharing today with you – it just fits my busy lifestyle best and it never disappoints!
Paikoillanne-valmiit-nyt!
Off you go baking your very own sourdough bread!
P.S.: further down you find an easy schedule to follow to make sure the bread is ready for a delicious Sunday brunch…
Hapajuurileipä
yields 1 loaf
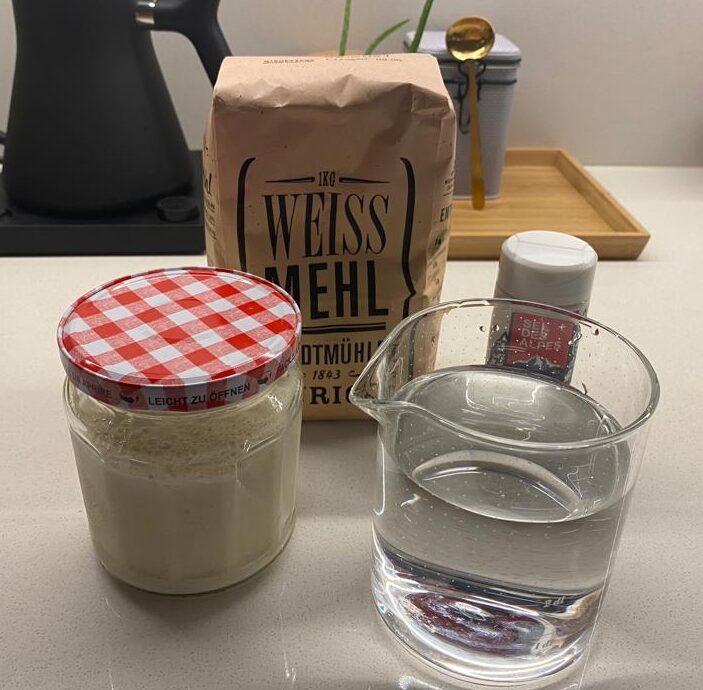
90 g sourdough starter (get the recipe here)
385 g water
520 g white flour
2 tsp salt
In a medium bowl (avoid metal ones) mix the flour with the salt.
Mix the sourdough starter with the water in another bowl (also non-metal). It will look like cloudy water.
Now add the cloudy water to the bowl with the flour. While stirring with a wooden spoon or your hands combine until all the flour is incorporated. No need to knead – it doesn’t have to be a smooth dough.
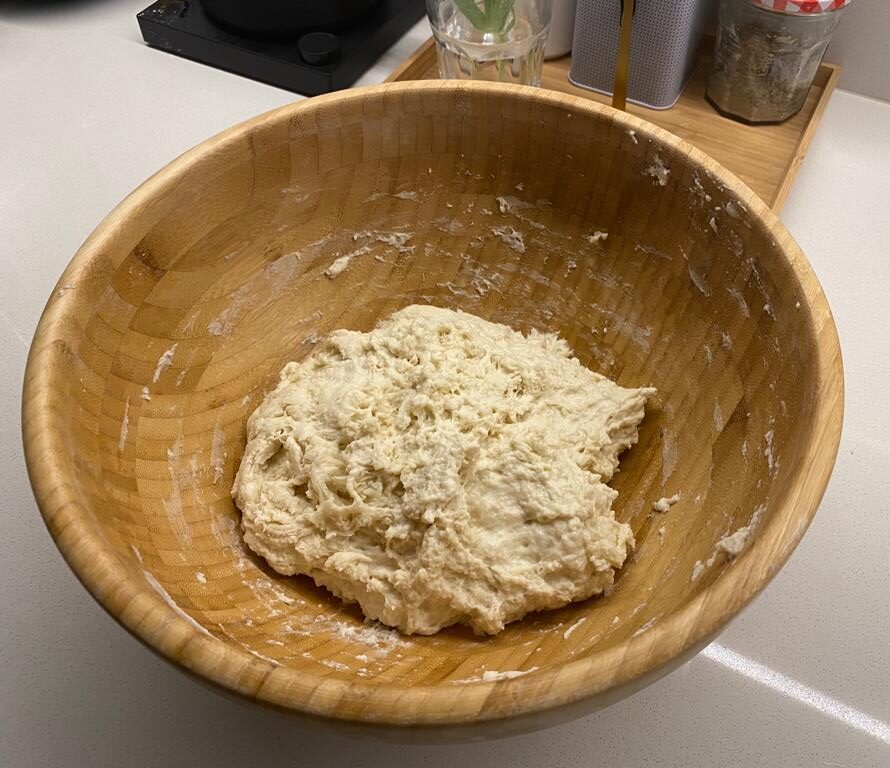
Cover the dough with a damp kitchen towel and let it rest for about 15 minutes. Then stretch and fold – see below video. Let it rest again for 15 minutes and perform a second stretch and fold.
Cover it again and let the magic work in an air-draft free spot for the next 8 to 12 hours.
After 8 hours check the dough – this is what you are looking for: almost doubled in size, and when poked carefully with a watered finger the dent will remain slightly. If not then let the dough rest further.
The dough is now ready for the last step before baking.
Prepare a bowl with parchment and flour it lightly.
Loosen the dough with wet hands from the sides of the bowl and lift it up and then transfer it to the prepared bowl letting it fold gently on itself. Sprinkle with some flour.
Place it in the fridge for 1 hour.
Preheat the oven to 260 degrees with the dutch oven placed inside.
Take the hot dutch oven out of the oven, take the lid off. Also take the dough out of the fridge. Gently lift the dough on the parchment out of the bowl and transfer it to the dutch oven, leave it on the parchment. Score it with a greased blade.
Cover with the lid and place in the middle of the oven.
After 20 minutes, remove the lid and continue baking for another 15 minutes until golden.
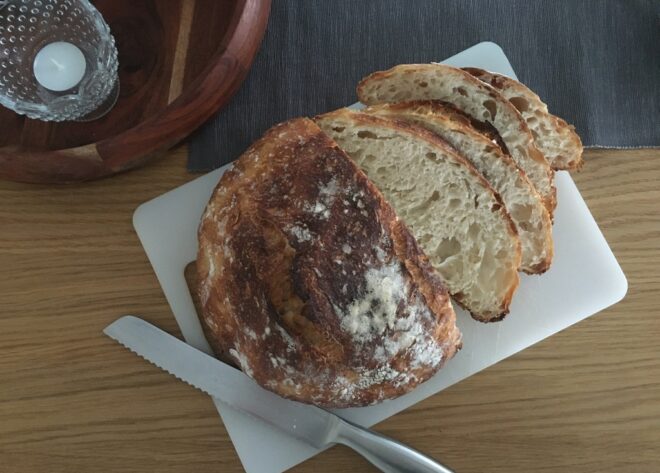
Let it cool before slicing as to not squash it. Enjoy!

Easy time schedule to follow to have fresh bread on Sunday morning (details above):
Saturday
- 12:00 o’clock: feed starter; if you prefer a more sour taste, use an unfed starter and skip this step
- 22:00 o’clock: mix ingredients together, perform the stretch and folds
- 22:30 o’clock: proof for 8-12 hours
Sunday
- 08:00 o’clock: place in parchment lined bowl for final proofing in fridge
- 08:30 o’clock: preheat oven with dutch oven inside
- 09:00 o’clock: place in dutch oven, score and bake with lid on for 20 minutes
- 09:20 o’clock: remove lid and bake another 15 minutes
- 09:35 o’clock: take it out and let it cool an a wire rack – enjoy!
